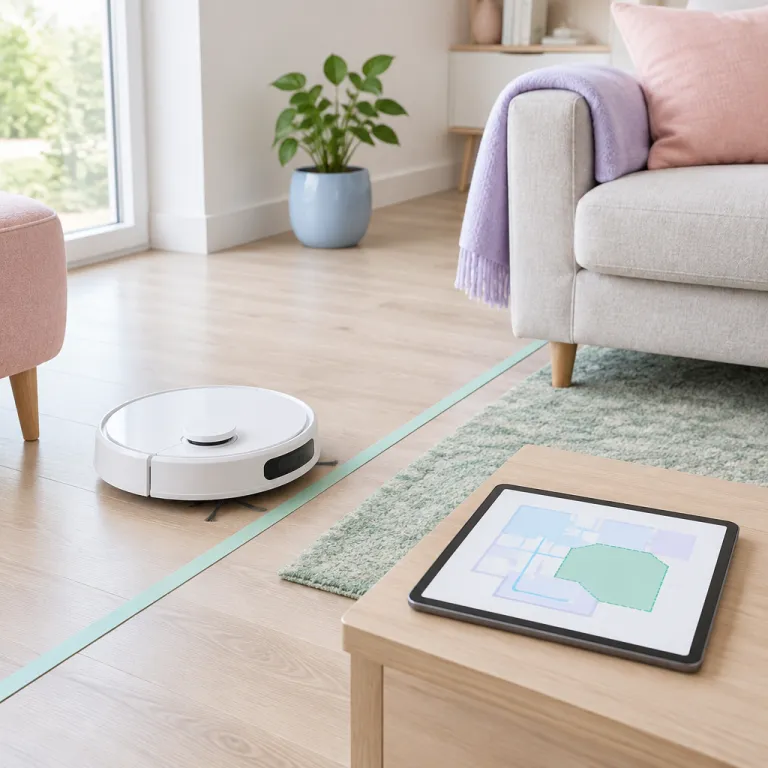
Why no-go zones matter more than suction power for busy families
Most parents focus on suction and battery when choosing a robot vacuum. Yet the real sanity saver is a careful robot vacuum no go zone virtual wall setup that keeps the machine out of the same trouble spots every single day. When you treat virtual boundaries as part of the layout rather than an optional extra, the vacuum cleaner finally works with your home instead of against it.
A modern robot vacuum uses lasers, cameras, or other sensors to build a detailed map of your rooms and furniture. That map lets you set precise zones where the robot vacuums can clean, and equally precise restricted areas where the vacuum will never cross unless you change the settings. For a busy parent juggling naps, homework, and pet chaos, that level of control turns random cleaning into predictable, low stress maintenance.
Think about the worst areas in your home before you even open the app. Pet bowls, cable nests behind media units, and children’s play zones are classic examples where a robot vacuum mop combination can cause more mess than it removes. When you mark these as no-go zones or walls zones on the digital map, the robot will avoid them automatically, instead of dragging water through toys or yanking chargers from sockets.
Physical barriers still have a role, especially when you need instant, visible control. Baby gates, closed doors, and simple magnetic strips on the floor can block a vacuum robot from entering a room even if the app fails or a guest starts the cleaning cycle. For grandparents or babysitters who do not want to learn another app, those physical barriers feel familiar and reliable, while you still rely on virtual walls for fine grained control.
Over time, a thoughtful mix of virtual barriers and physical barriers gives you the best of both worlds. The robot vacuums handle routine cleaning in open areas, while boundary strips, baby gates, and low furniture edges define the permanent virtual boundary lines you reinforce in software. Done well, your robot will clean more floor, hit fewer obstacles, and stop waking the baby by chewing on the same shoelaces every afternoon.
Physical barriers versus app based no-go zones in real homes
Choosing between physical barriers and app based zones starts with your floor plan. If your home has clear transitions between areas, like doors or steps, then simple baby gates or magnetic strips can block a vacuum from entire rooms with almost no setup. In open plan spaces, though, you need a more nuanced robot vacuum no go zone virtual wall setup that can carve invisible lines through a shared room.
Physical barriers shine when you want an obvious, always on boundary. A baby gate across the nursery door guarantees that any robot vacuum or vacuum mop will avoid the sleeping child, even if someone accidentally presses the clean button on the dock. Likewise, magnetic strips on the floor can create a hard boundary in front of a fireplace hearth or under fragile furniture, so even older vacuums without advanced sensors respect those restricted areas.
App based virtual walls and zones virtual features excel when your needs change throughout the day. You might let the robot clean the kitchen and dining room after breakfast, then set a temporary virtual boundary around the play mat while the kids build with blocks. Because the map lives in the app, you can redraw those virtual boundaries in seconds without moving any physical barriers or rearranging furniture.
For multi room apartments, app control also makes multi floor cleaning more realistic. Each floor gets its own map, its own walls zones, and its own set of no-go zones tuned to the furniture and clutter on that level. A hallway lined with low furniture on the upper floor might need tight virtual walls, while the basement with concrete floors and a wall mounted vacuum system can stay almost completely open.
If you find yourself stacking boxes or chairs to block the robot every time you run a cleaning cycle, that is a red flag. It usually means the current robot vacuum no go zone virtual wall setup is not using the app to its full potential, or that the robot’s obstacle avoidance is too basic for your layout. In those cases, upgrading to a model with better sensors and more flexible virtual barriers is often cheaper, in stress terms, than constantly wrestling with improvised walls.
For readers considering broader whole home solutions, a central or wall mounted vacuum can complement robot vacuums rather than replace them. A detailed guide to an efficient wall mounted vacuum system shows how spot cleaning and deep suction handle stairs and corners that robots miss. Together with smart virtual walls, that combination keeps both daily dust and occasional deep dirt under tighter control.
How to draw smarter no-go zones on your robot’s map
The most common mistake with no-go zones is drawing them too small. A robot vacuum is not a precision instrument, so your robot vacuum no go zone virtual wall setup needs generous margins around problem areas like pet bowls or cable clusters. Think of each virtual wall or box as a safety buffer, not a tight outline, because the robot’s sensors and wheels introduce a little wobble on every pass.
Start by running a full cleaning cycle with no restrictions and watch where the robot struggles. Note any furniture legs it keeps nudging, any low furniture it tries to wedge under, and any cords it drags across the room. Then open the app, zoom into those areas on the map, and set rectangular or L shaped zones virtual that extend at least 20 to 30 centimeters beyond the visible obstacle.
Most apps from Roborock, Dreame, Ecovacs, and iRobot let you layer multiple virtual boundaries. Use one virtual boundary to block the entire back of a TV stand where power strips live, then add a smaller box around the pet water bowl to keep a vacuum mop from splashing. Overlapping zones are fine, and in cluttered rooms they are often the only way to keep the robot vacuums from threading a path through tiny gaps you would never choose yourself.
Shape matters as much as size. Long, thin virtual walls work well along the edge of a rug with tassels, while broader zones suit irregular restricted areas like Lego cities or train tracks. If your app supports custom labels, name each boundary by function, such as “cables,” “pet feeding,” or “nursery,” so you remember why that part of the map is off limits when you review your setup months later.
Some newer robots use ultrasonic or infrared sensors to refine obstacle avoidance around chair legs and table bases. A technical overview of ultrasonic distance sensing for virtual walls in robot vacuums explains how those sensors detect obstacles before contact, reducing the need for huge no-go boxes. Even with advanced sensors, though, you still want at least a small buffer zone around delicate furniture or unstable décor that could topple if nudged.
Revisit your map after the first week and again after a month. If the robot still gets stuck in certain areas, expand the virtual barriers or add new boundary strips on the floor as a backup. Over time, this iterative tuning turns a generic cleaning robot into a vacuum cleaner that feels almost custom fitted to your home’s quirks.
Brand specific tips for virtual walls, schedules, and multi floor maps
Every major brand handles robot vacuum no go zone virtual wall setup a little differently. Roborock and Dreame lean heavily on LiDAR mapping, which produces crisp floor plans where you can draw precise virtual walls and name each room for targeted cleaning. Ecovacs and iRobot often blend camera based navigation with other sensors, which can be slightly less sharp on the map but still very effective for everyday boundaries.
On Roborock models like the S8 series, open the app, select the floor map, and tap the no-go icon to draw rectangles or lines. You can set different zones for vacuum only or vacuum mop modes, which matters if you want the robot to clean carpets but keep the damp pad away from hardwood under a dining table. Dreame’s app offers similar control, letting you assign cleaning modes per room so the vacuum will avoid mopping in carpeted areas even without extra boundaries.
Ecovacs often calls its virtual boundaries “virtual walls” and “no mop zones,” and you can place them directly on the map after a full scan. Use no mop zones around rugs and soft mats, then add full no-go zones around cable nests or unstable furniture. iRobot’s Imprint Smart Mapping lets you label rooms and create keep-out zones, though the shapes are sometimes less flexible, so you may need to combine a larger zone with physical barriers like baby gates for tricky layouts.
Multi floor homes require separate maps, and each map needs its own set of virtual barriers. When you carry the robot to another level, make sure the app recognizes the new floor and loads the correct map before you press clean. A hallway with low furniture on the upper floor might need tighter walls zones than the open living room downstairs, while the basement might only need a single virtual wall to block a storage corner.
Scheduling adds another layer of control that many families underuse. You can set weekday routines where the robot vacuums the kitchen after breakfast, then avoid the nursery during nap time by activating a temporary restricted area. In the evening, a different schedule might let the vacuum cleaner run in the hallway and entryway while kids’ play zones stay protected behind both virtual boundaries and physical baby gates.
For homes that rely heavily on mopping, pairing smart zones with the right pads and solutions matters as much as the map. A detailed guide to cleaning tools that elevate robot vacuum mopping shows how better pads and compatible solutions improve stain removal without damaging floors. Combine those tools with carefully drawn no mop zones, and your vacuum mop can handle sticky kitchen spills while still respecting carpets and children’s soft play mats.
When too many no-go zones signal the wrong robot for your layout
If your map looks like a patchwork of red boxes, something is off. A good robot vacuum no go zone virtual wall setup should feel like a few strategic guardrails, not a maze that leaves only narrow strips for cleaning. When you spend more time drawing virtual walls than the robot spends actually cleaning, it is time to reassess.
Start by asking why each boundary exists. Some restricted areas are non negotiable, like pet feeding zones, cable clusters, and delicate furniture that a vacuum cleaner should never touch. Others, such as piles of shoes or laundry baskets, might be better solved by changing habits or adding simple storage rather than carving more zones virtual into the map.
Excessive no-go zones often reveal weak obstacle avoidance or poor sensors. Older vacuums without 3D sensors tend to wedge under low furniture, tangle in cords, and misjudge dark rugs, forcing you to block half the room just to keep them moving. In those cases, upgrading to a robot with better obstacle avoidance and more accurate sensors can reduce the number of necessary virtual boundaries by half or more.
Look at the pattern of where the robot gets stuck. If it always fails at transitions between floor types, like thick rugs or thresholds, a few boundary strips or magnetic strips might be enough to tame the problem. If it struggles everywhere, from chair legs to toy baskets, the issue is likely the robot’s navigation rather than the layout, and no amount of virtual barriers will fully compensate.
Sometimes the fix is as simple as sliding a sofa or media unit by a few centimeters. A tiny change in furniture placement can open a clear path so the vacuum will clean an entire room without needing extra walls zones on the map. For families with crawling babies, that small adjustment can mean the difference between a robot that quietly maintains floors and one that constantly interrupts naps by beeping for rescue.
Remember that the goal is a robot that you barely think about. When the right mix of virtual walls, physical barriers, and smart scheduling is in place, the robot vacuums most open areas reliably while you handle corners and stairs with a handheld or wall mounted vacuum. The test is simple ; on a busy Tuesday morning, your floors should look clean enough that nobody wonders when the robot last ran.
FAQ
How big should I make a no-go zone around pet bowls ?
Give pet bowls more space than you think they need. A rectangle extending at least 30 to 40 centimeters on all sides keeps a vacuum mop from splashing water or dragging kibble across the floor. If your robot still nudges the bowls, expand the virtual boundary or add a small physical mat as an extra buffer.
Do I still need physical barriers if my robot has virtual walls ?
Yes, physical barriers still help in key spots. Baby gates and closed doors provide a fail safe for rooms that must stay off limits, such as nurseries or home offices with many cables. Virtual walls then handle finer control inside shared areas, like blocking just the TV stand or a single toy corner.
How often should I update my robot’s map and zones ?
Update your map whenever you change furniture or add new clutter zones. After a big rearrange, run a fresh mapping pass, then redraw no-go zones around new cable clusters, pet areas, or play spaces. A quick review every month keeps the robot aligned with how your family actually uses each room.
What if my robot keeps getting stuck even with no-go zones set ?
Persistent problems usually mean the zones are too small or the robot’s sensors are limited. Try enlarging restricted areas and adding boundary strips or magnetic strips in the worst spots. If it still struggles across many rooms, consider a model with stronger obstacle avoidance and more precise mapping.
Can I set different no-go zones for each floor of my home ?
Most mapping capable robots support separate maps for multiple floors. After creating a map for each level, you can draw unique no-go zones and virtual boundaries tailored to that floor’s layout and furniture. Just confirm the app has loaded the correct map before starting a cleaning run on a different level.