What Does the Yellow Flashing Light Mean?
Decoding the Yellow Light Alert
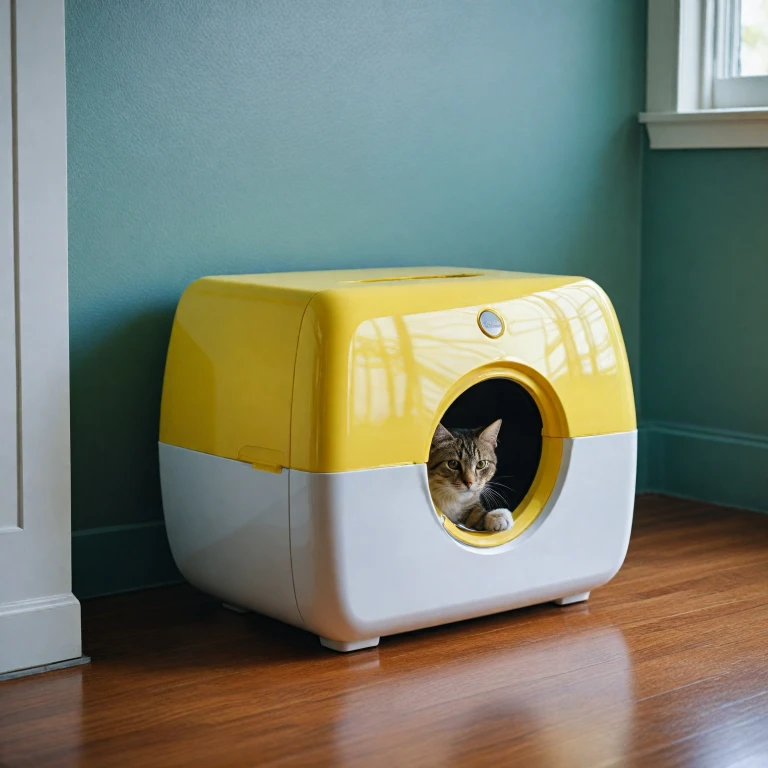
Understanding the yellow flashing light on your litter robot can save you from unnecessary stress and help ensure the machine's optimal performance. Typically, this light is an indication that something requires your attention. But before panic sets in, learning what this signal truly represents is key. The yellow light does not necessarily mean your unit is in distress; in many cases, it serves as a helpful warning. This indicator might relate to the need for a cleaning cycle or could point to something blocking the globe's rotation. It might be as simple as a signal to fill the litter. If you've recently changed the litter but the yellow light persists, it could involve the sensor. Sensors may occasionally need recalibration or cleaning to restore accuracy. Resolving these common issues might restore peace to your routine, highlighting the relevance of preventive maintenance.In more complex scenarios, the yellow flashing light might indicate a system delay triggered by internal complications beyond a user’s control, suggesting professional help might be needed. But before reaching this step, simple troubleshooting and regular maintenance should be attempted for success. For solutions tailored to similar tech, consider insights from troubleshooting other robots, like addressing Roomba charging issues, which might offer valuable techniques and remedies. Learn more.
Common Causes of the Yellow Light
Recognizing the Yellow Light Triggers
Spotting a yellow flashing light on your litter robot can be perplexing, but understanding what causes it can make troubleshooting a smoother process. The presence of this light usually indicates an issue that requires attention to ensure the successful operation of the litter robot. Here’s a closer look at the common causes:
- Sensor Obstructions: The yellow light frequently illuminates due to blocked or malfunctioning sensors. Any debris or object blocking these components can disrupt the robot's ability to function as expected.
- Globe Misalignment: Misalignment or blockage of the globe often triggers this light. Ensure the globe sits properly without obstruction and rotates smoothly during its cleaning cycle.
- Fill Level Concerns: An overfilled litter or incorrect balance can hinder the robot's operation and trigger the flashing light. Ensure the fill level is within the recommended guidelines by the manufacturer.
- Black and White Components: A mismatch in parts or damages in the top, black, or white components could also lead to the flashing light, requiring a more detailed inspection.
To successfully navigate these challenges, users can appear overwhelmed. Recognizing these underlying causes can guide you in performing the essential troubleshooting steps discussed in the subsequent section. For those keen on exploring more accessories aiding in maintaining your robot efficiently, consider unlocking the potential of the crevice tool in robot vacuums for additional help in cleaning and maintaining the litter robot.
Troubleshooting Steps for the Yellow Light
Practical Steps to Address the Yellow Light Issue
If you've noticed the yellow flashing light on your litter robot, it's time to get hands-on with your troubleshooting. These straightforward steps can guide you toward a resolution and get your device back on track.- Inspect the Globe and Scale
- First, ensure there are no obstructions or jammed waste in the globe that could interfere with the sensors. Also, check the litter's fill level as excessive litter might disrupt the sensor functionality, leading to the yellow light.
- Gently press the globe back into its correct position. Misalignment can also trigger the yellow light, and a correctly seated globe is paramount.
- Check the Sensors
- A crucial step involves examining the sensors. Over time, dust can accumulate on these components, affecting their sensitivity and performance. Use a dry cloth to wipe them clean and ensure their stroke and width range aren't compromised.
- Monitor the sensor’s functionality by observing for changes in the yellow light. By eliminating dust or blockage issues, you help maintain the sensor's accuracy.
- Reset the Robot
- Sometimes, a simple reset of your litter robot can resolve system glitches. To do this, turn off the unit and unplug it for a few minutes before plugging it back in. This action can help in eliminating any temporary delay in response caused by minor system errors.
- Verify Control Panel Buttons
- Check if the buttons on the control panel, especially the top and the white button, are working properly. A stuck or unresponsive button could cause the yellow light to activate.
When to Seek Professional Help
Knowing When It's Time for Expert Intervention
Encountering the persistent yellow flashing light can indicate that your attempts at troubleshooting haven't been successful. It might be time to seek professional help. Here are some indications that professional assistance is warranted:- Persistent Alerts: If the yellow light continues to flash despite attempts at cleaning or resetting the litter robot, it may indicate an underlying issue needing expert attention.
- Malfunctions in Sensors: The failure of the robot to detect the proper fill level or issues with the scale under the globe could mean that the sensors require professional calibration or replacement. A technician can accurately assess sensor failures, considering the scale width and stroke details that might be missed otherwise.
- Unusual Noises: If there's a black stroke or certain motions hindering the robot's globe rotation, professional examination of motor and mechanistic functioning, including the delay in actions, is advised.
- Repeated Manual Actions: Frequent need to press the reset button or manually adjust components could hint at deeper electronic issues that a certified technician should address.
Preventive Maintenance Tips
Safeguarding Your Litter Robot with Regular Care
When you interact with your Litter Robot, understanding the yellow flashing light is just part of maintaining optimal functionality. Ensuring the device operates smoothly lies in routine preventive maintenance. Here are a few tips to keep your robot light and overall device in top shape:- Regular Cleaning: The globe requires periodic cleaning to remove dust or litter particles. Over time, these materials can affect the sensor and lead to yellow light warnings. A small delay in cleaning might not seem critical, but frequent care is crucial.
- Inspect the Sensor: The sensor plays a pivotal role in detecting issues such as capacity or blockage. Keep the white and black components clear from obstruction to avoid false yellow light indications.
- Avoid Overfilling: Be cautious not to overfill the litter tray. Excessive litter can press against the globe, which might complicate the motor functions and trigger yellow light codes.
- Check the Stroke Width: If you encounter mechanical issues, verifying the stroke width or path can help diagnose the problem early and prevent escalation.
- Gauge Weight Load: Ensure the unit isn't overloaded with excess weight. The scale feature within the robot helps when balancing the device's action for successful litter movements.
User Experiences and Feedback
Insights from Fellow Litter Robot Users
Understanding how other users have dealt with the yellow flashing light can be incredibly helpful. Many users have shared their experiences in forums and reviews, offering insights that might assist you in effectively resolving the issue.- Common User Feedback:
- Effective Cleaning Techniques:
- Privacy and Security Concerns:
- Successful DIY Fixes: